How To Build Forms Using AWeber

Table of Contents
A crucial part of building a subscriber list is actually collecting the contact details! It can be cumbersome to work with various form plugins.
When using AWeber for your email marketing, you get access to an intuitive form builder! This means you do not need to work with extra plugins that may slow down your site.
Similar to building landing pages on AWeber, the templates that AWeber provides for forms are purpose-built for conversion optimization.
You can create customizable sign-up forms depending on your requirements. Here is how you can do that.
Benefits of Sign Up Forms with AWeber
Place Them Wherever They Want
AWeber allows you to create dynamic opt-in forms that look good on any device. For example, you can choose to place it as in-line within an existing blog post, or choose to have it as a pop-up, or as a lightbox form that slides or fades in on a time delay. The choice is yours. The form is responsive to the screen size and fits itself according to the screen size it is rendered on.
No Website? AWeber Has Got Your Back
You don’t necessarily need to have a website to create a signup form using AWeber. This is because AWeber can host the signup form for you and provide you with a link to share within your network.
Test It Out!
So, what is working and what is not? You can create forms with different copies and offers and test to determine the performance of each sign-up form.
Types of Sign Up Forms
AWeber supports a range of sign forms, including:
In-line
This form is rendered directly on the page. It is not a pop-up type but is delivered in-line on the page.
Pop-over
A pop-over sign-up form is not technically a pop-up form. Hence, it doesn’t get blocked by pop-up blockers. It doesn’t open in a new window and can be adjusted to appear right after when the page loads. Alternatively, you can choose to fade in or slide in from any direction on the web page.
Lightbox
Similar to the pop-over form type, the lightbox form is displayed above the content on your website. You can control the way the form appears on the page. What’s more, this form also darkens the content behind it on the page to help readers focus on your form.
Pop-up
Opposite to pop-over, a pop-up form is a traditional pop-up form that loads in a new window. Although lightbox and pop-over forms are recommended over the pop-up type, you can actually use the pop-up form to display it to visitors when they are about to leave your website.
Step by Step Instructions to Build Forms Using AWeber
1. Click on the “Create a Sign-Up Form” button.

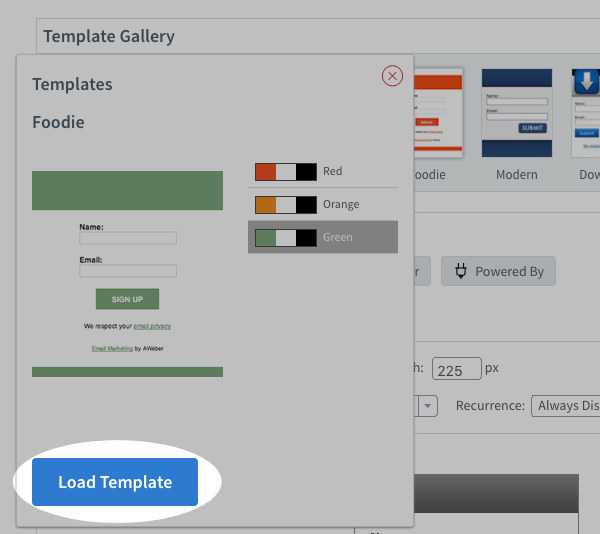
2. Choose an appropriate template for your form by browsing through the Template Gallery.

3. Click on the Show More option to explore all the available categories.

4. You can check out different categories to select a template that matches your website theme and design.
Select the best one for your niche.
5. Choose the color theme and click Load Template when you have found the one you will like to have.

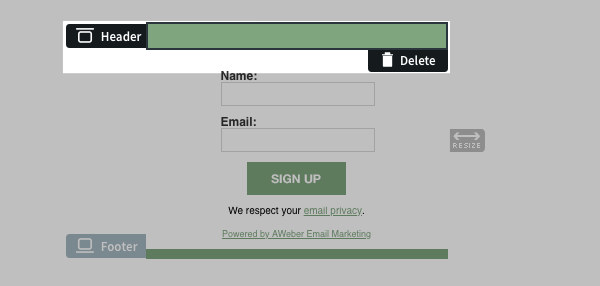
This will load the template for you. Now, you can customize the form as needed.
You can add text to the header by clicking on it. You can add a headline in the header section to help the visitors understand why they should sign up.

6. Click on “Go to Step 2”.

7. Name your form
Your subscribers won't be able to see this name, but it will help you distinguish this form from others that you create later.

8. Select your landing page redirect.
Choose the landing page you want your users to redirect to after submitting the form. Although AWeber offers a default Thank You page, you can choose to send them to any page on your website.

9. Save the form and click “Go to Step 3”.

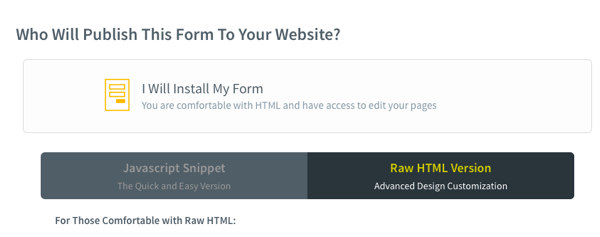
10. Publish your form
Now, you are ready to publish your form on the site. You can do so with the help of the HTML provided or send it to your designer.

Conclusion
AWeber is known for its quick and simple interface. Creating a sign-up form is pretty straightforward too. This is also the reason that the platform is used by a range of small businesses and entrepreneurs for their email marketing needs. AWeber is the right email marketing services provider for you if you don’t need anything fancy but just the right mix of the right features. You can also learn more about the tool in our AWeber review here.
Share this article


