Free Virtual Event Budget Template For Your Next Event

Table of Contents
Over the years, I hosted many virtual events. For smaller virtual events, budgeting is pretty straightforward.
On the other hand, budgeting for large virtual events is a whole different story. Large virtual events are complex, there are tens if not hundreds of budget line items that you need to track.
Naturally, I had to simplify my life and create a virtual event budget template for all my virtual events.
The good news is that I’m making this template available for you! You can simply download it when you scroll a bit down. This template is usable on Google Sheets or Excel.
Here are the main features of the template:
- You can allocate a budget to spend categories through line items. This means that you can keep track of budget grants or removals throughout the event process.
- You can add as many spend categories as you want. The document will update everything without any additional action from your side.
- You can include as many cost line items as you want. There is no limit and the design will keep working.
- It includes a management tab, which will show the budget and costs per spend category.
- There is a details page, which shows you all the line items per spend category automatically.
- There are charts that update automatically. You can copy and paste these in your presentations to management.
In this article, I will explain exactly how this virtual event budget template works. Don’t worry, it’s super straightforward!
So go ahead and download the budget template below.
The management summary
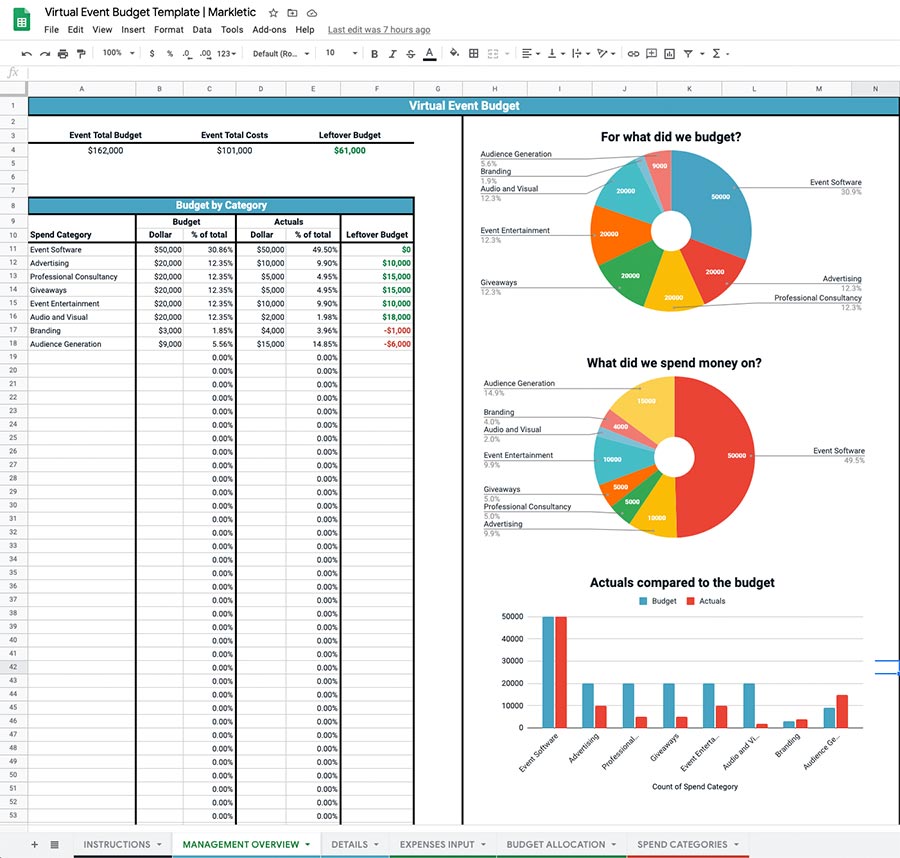
The “Management Overview” tab in the virtual event budget template gives you a high-level overview of the financial state of your event.
This tab is fully automated, so be sure to not edit anything here.
In the management summary, you will find the total budget that you have allocated to the event, as well as the total costs.
In addition, you find a useful overview of the budget status of the spending categories that you will define in the next step of this article.
For each spending category, you will see the budget that was allocated, the costs that were made, and the remaining budget.
This tab also includes some handy charts that show:
- How much budget was allocated to each spending category;
- How much money was spent on each category.
- Your budget compared to your expenses by each category.
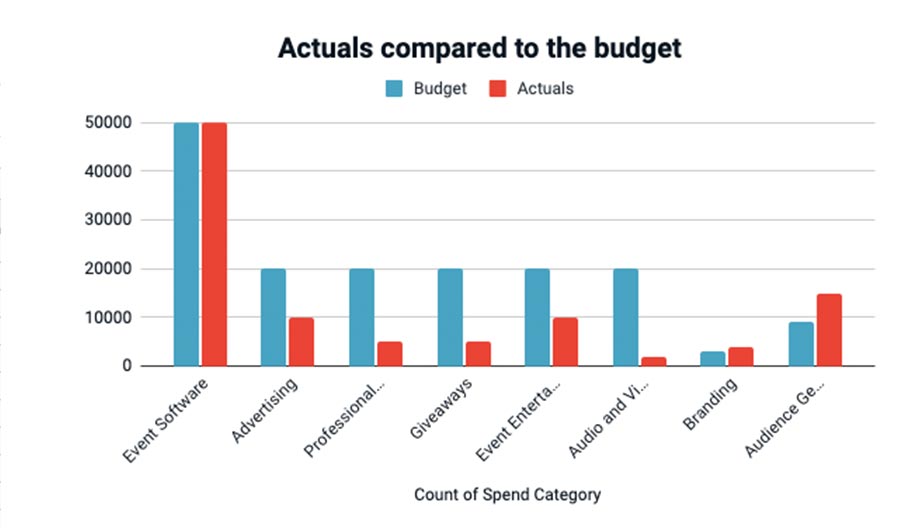
This is useful for when you need to present the financial situation of the event to stakeholders.
Adding Spend Categories
In the tab “spend categories” of the virtual event budget template, you have the ability to add additional spending categories.
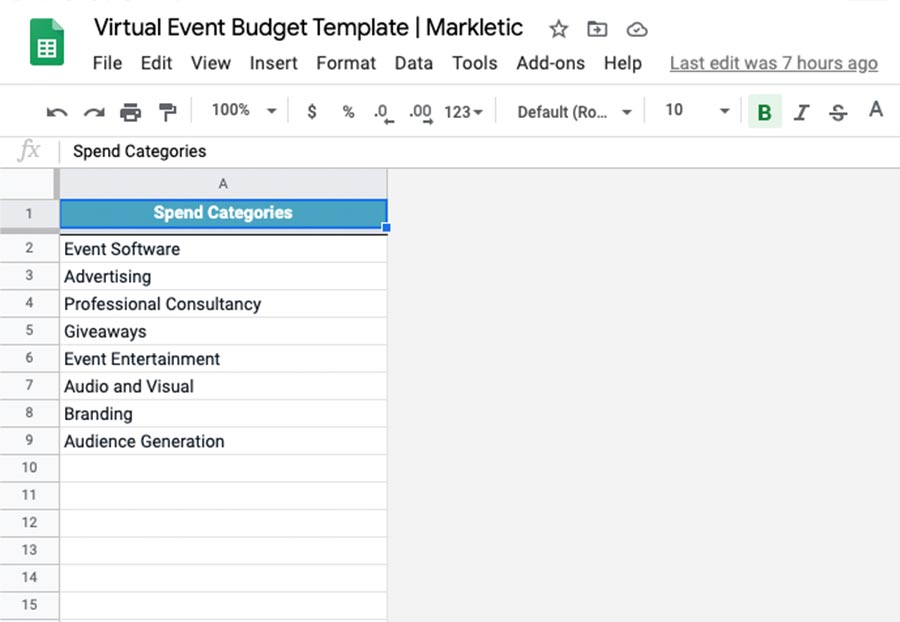
Spending categories vary at each organization and so you have the full flexibility to identify all the spending categories that are important to you.
There is a list of predefined categories, but you can remove them if required.
The spending categories you list here will be automatically updated throughout the document, including in drop-down fields.
Allocating budget to spend categories
When it comes to virtual events, there are many different categories that you can budget for. Depending on the type of virtual event, the money you will allocate to a certain category might differ greatly.
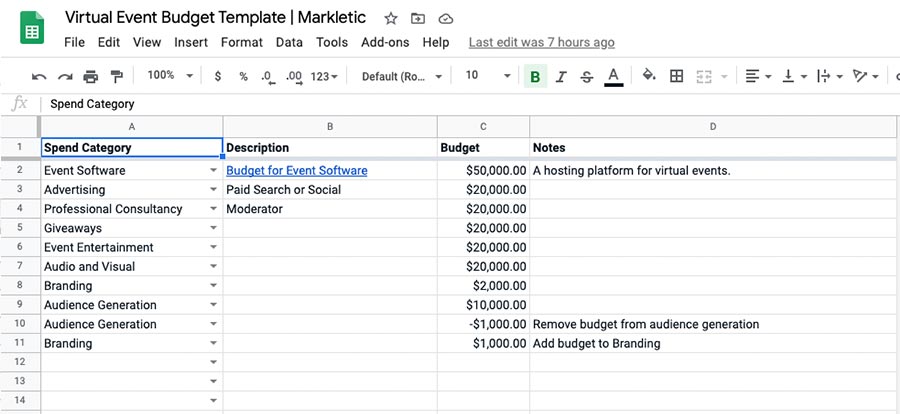
The benefit of this virtual event budget template is that you have the full flexibility to add as many spend categories as needed. In addition, you can allocate whatever amount of budget your want.
So start allocating budget to your spend categories, navigate to tab “Budget Allocation”.
In this tab, you add budget to spend categories by adding a positive number. In addition, there is room to place some notes.
Sometimes, it will happen that you take away budget from a spend category and allocate it to another category.
This is possible!
To remove budget from one category and add it to another one simply:
- Add a new line item with a negative number to remove budget from a category;
- Add a new line item with a positive number to add budget to another one.
The benefit of this is that you will have a track record of your budget allocation to the various categories.
Inputting costs in the document
To add virtual event costs to the document, simply navigate to the tab “Expenses Input”. Similarly to allocating budget, here you can add your costs line item by line item.
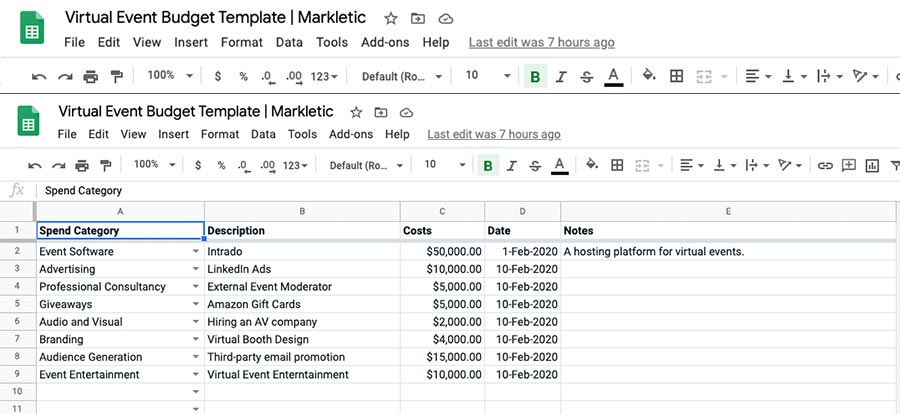
This is incredibly useful for you to keep a track record and clear over what was spent and when.
Simply select a spend category in column A and add the costs associated with that line item.
If at any case, you feel the need to add additional spend categories, simply add it in the tab “Spend Categories”. It will automatically be added to the expenses input tab.
Be sure to always add a consistent date format. I always like to use a format such as “10-dec-2020”.
This is because it’s universally understandable and there is never any doubt on the date. Some people will input the 7th of July as:
- 07/06/2020; or,
- 06/07/2020.
When inputting it like 07-Jul-2020, there is never any confusion.
Analyse the details per spend category
In the tab “Management Overview”, you get a clear overview of the current status of your virtual event budget.
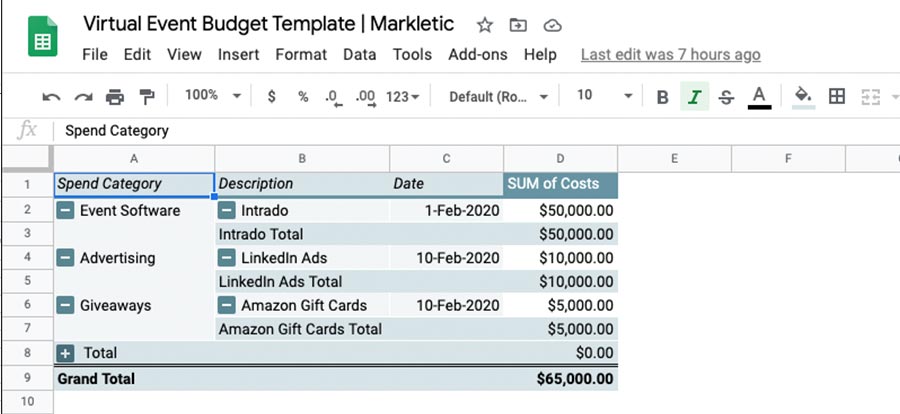
However, sometimes you need to dive into the details. This is where the “Details” tab comes into play.
This tab analyses your expenses through a pivot table. When clicking on the pivot table, you can change the rows and columns to your needs.
However, the default configuration provides a clear overview of your spend categories, the details and when it was spent.
This is usually all you need, but again, this is fully flexible and you can change it according to your needs.
Financial planning is crucial to the successful execution of an event. This virtual event budget template will help you streamline your finances.
However, there is a lot more to event planning than just budget management. Therefore, I highly recommend having a browse through the below resources:
Share this article

